在做项目的时候,小项目可以不考虑封装,项目大的话就得考虑请求接口封装了,我们在改动的时候也方便,而且节省了很多代码。以下是一个简单的封装例子,供大家参考和使用
1、 首先在更目录下新建util文件夹,在里面新建个api.js

1、在api.js添加如下请求代码
const BASE_URL = "http://www.example.com"
let ajaxTimes=0;
export const myRequest = (option)=>{

         ajaxTimes++;
         uni.showLoading({
                            title: "加载中",
                       mask: true,
                   });
         return new Promise((resolve, reject)=>{
                   uni.request({
                            url: BASE_URL + option.url,
                            method: option.method || 'GET',
                            data: option.data || {},
                            success: (res) => {
                                     if(res.data.code !=200){
                                               // uni.showToast({
                                               //      title: '获取数据失败'
                                               // })
                                     }
                                     resolve(res)
                            },
                            fail: (err) => {
                                      uni.showToast({
                                               title: '请求接口失败'
                                     })
                                     reject(err)
                            },
                            // 完成之后关闭加载效果
                            complete:()=>{
                                     ajaxTimes--;
                                     if(ajaxTimes===0){
                                               //  关闭正在等待的图标
                                               uni.hideLoading();
                                     }
                            }
                   })
         })
}2、挂载到全局main.js
import { myRequest } from './util/api.js'
Vue.prototype.$myRequest = myRequest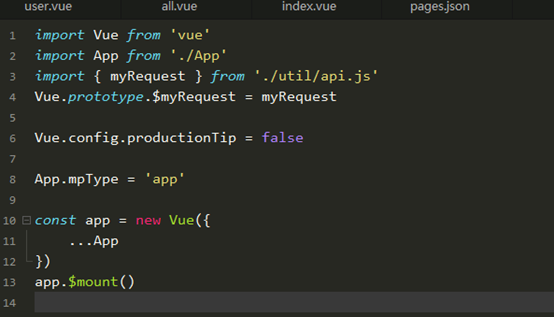
3、使用方法
<script>
         export default {
                   data() {
                            return {}
                   },
                   onLoad() {
                     this.getVod()
                   },
                   methods: {
                            async getVod(){
                                     const res = await this.$myRequest({
                                               url: '/api/Uniapp/home'
                                     })
                                     console.log(res)
                            }
                   }
         }
</script>
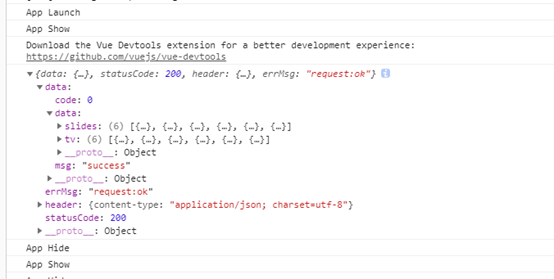
4、接口访问结果







 关于简忆
关于简忆 简忆诞生的故事



 粤ICP备16092285号
文章评论(0)