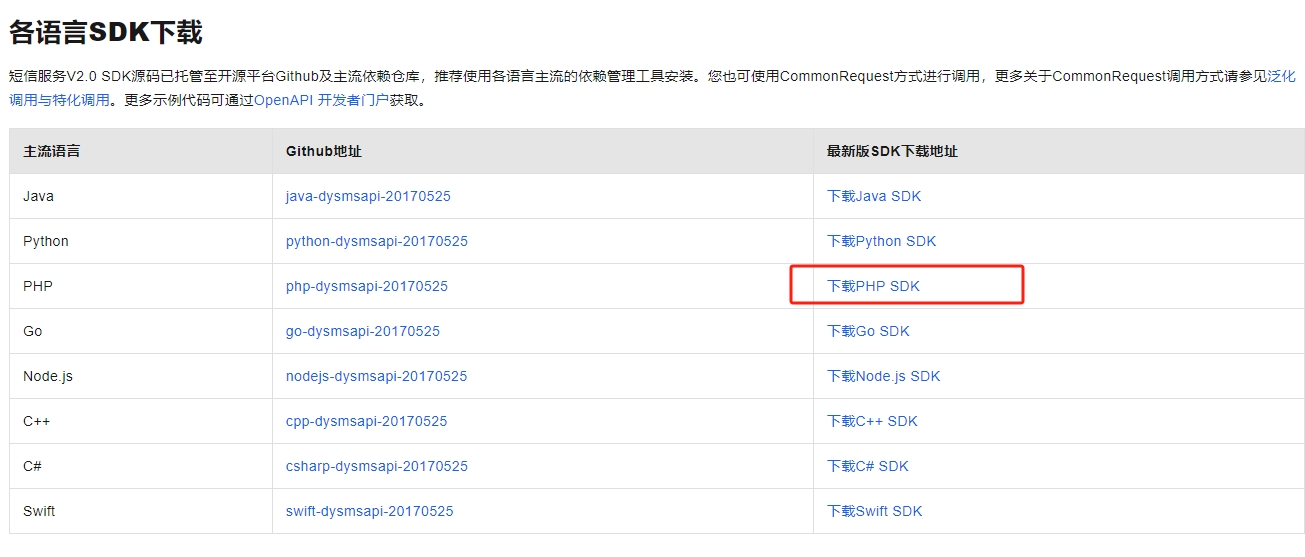
Laravel如何在注册账号的时候,接入阿里云短信发送短信验证码,首先先下载官方SDK:
1、下载SDK:官方SDK
2、引入SDK
将SDK解压放置http://app/Http/lib/目录下,并添加至composer.json文件里面的classmap里面
"autoload": {
  "classmap": [
    "app/Http/lib/Email",
    "app/Http/lib/wxBizDataCrypt",
    "app/Http/lib/aliyunSms"
  ],
  "files": [
    "bootstrap/helpers.php"
  ],
  "psr-4": {
    "App\\": "app/",
    "Database\\Factories\\": "database/factories/",
    "Database\\Seeders\\": "database/seeders/"
  }
},
3、执行加载
进入项目根目录下,执行
composer dumpautoload
4、代码编写:
4.1、引入
<?php
use Aliyun\Core\Config;
use Aliyun\Core\Profile\DefaultProfile;
use Aliyun\Core\DefaultAcsClient;
use Aliyun\Api\Sms\Request\V20170525\SendSmsRequest;
use Aliyun\Api\Sms\Request\V20170525\SendBatchSmsRequest;
use Aliyun\Api\Sms\Request\V20170525\QuerySendDetailsRequest;
?>
4.2、发送验证码方法
public function sms(Request $request){
  $startTime = Carbon::today()->startOfDay()->timestamp; //获取今天日期的开始时间戳
  $endTime = Carbon::today()->endOfDay()->timestamp;//获取今天日期的结束时间戳
  $mobile = $request->phone;
  // 判断手机号是否为空
  if(empty($mobile)){
    return $this->jsonData(ApiErrDesc::ERROR_PHONE[0],ApiErrDesc::ERROR_PHONE[1]);
  }
  $findall = DB::table('sms_code')->whereBetween('created_at', [$startTime, $endTime])->where(array('tel'=>$mobile))->count();
  if($findall >= 5){
    return $this->jsonData(ApiErrDesc::ERROR_SMS_TOP[0],ApiErrDesc::ERROR_SMS_TOP[1]);
  }
  $code=mt_rand(10000,99999);
  $result=$this->sendMsg($mobile,$code);
  if($result['Code'] == 'OK'){
    $data=[
      'tel'=>$mobile,
      'code'=>$code,
      'created_at'=>time(),
    ];
    // halt($data);
    $res=DB::table('sms_code')->insert($data);
    if($res){
      return $this->jsonData(ApiErrDesc::SUCCESS_SMS_SEND[0],ApiErrDesc::SUCCESS_SMS_SEND[1]);
    }else{
      return $this->jsonData(ApiErrDesc::ERROR_SMS_SEND[0],ApiErrDesc::ERROR_SMS_SEND[1]);
    }

  }
}
4.3、验证码函数及配置
//阿里短信函数,$mobile为手机号码,$code为自定义随机数
public function sendMsg($mobile,$code){
  Config::load();       //加载区域结点配置
  $accessKeyId = 'iynxGGXCEQuSKMDm7GQ5qA'; //阿里云短信获取的accessKeyId
  $accessKeySecret = 'xstTCCBXASERS9BvVrNpS7G7I';  //阿里云短信获取的accessKeySecret
  //这个个是审核过的模板内容中的变量赋值,记住数组中字符串code要和模板内容中的保持一致
  //比如我们模板中的内容为:你的验证码为:${code},该验证码5分钟内有效,请勿泄漏!
  $templateParam = array("code"=>$code);      //模板变量替换
  $signName = '简忆博客'; //这个是短信签名,要审核通过
  $templateCode = 'SMS_464785564';  //短信模板ID,记得要审核通过的
  //短信API产品名(短信产品名固定,无需修改)
  $product = "Dysmsapi";
  //短信API产品域名(接口地址固定,无需修改)
  $domain = "dysmsapi.aliyuncs.com";
  //暂时不支持多Region(目前仅支持cn-hangzhou请勿修改)
  $region = "cn-hangzhou";
  // 初始化用户Profile实例
  $profile = DefaultProfile::getProfile($region, $accessKeyId, $accessKeySecret);
  // 增加服务结点
  DefaultProfile::addEndpoint("cn-hangzhou", "cn-hangzhou", $product, $domain);
  // 初始化AcsClient用于发起请求
  $acsClient= new DefaultAcsClient($profile);
  // 初始化SendSmsRequest实例用于设置发送短信的参数
  $request = new SendSmsRequest();
  // 必填,设置雉短信接收号码
  $request->setPhoneNumbers($mobile);
  // 必填,设置签名名称
  $request->setSignName($signName);
  // 必填,设置模板CODE
  $request->setTemplateCode($templateCode);
  // 可选,设置模板参数
  if($templateParam) {
    $request->setTemplateParam(json_encode($templateParam));
  }
  //发起访问请求
  $acsResponse = $acsClient->getAcsResponse($request);
  //返回请求结果
  $result = json_decode(json_encode($acsResponse),true);
  return $result;
}
5、前端代码:
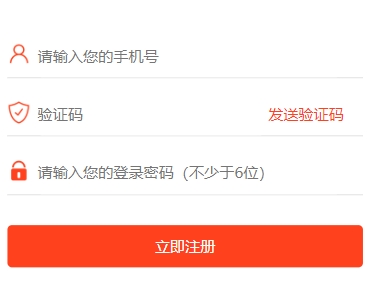
5.1、html部分:
<div class="login_form">
  <label for="">
    <img src="{{asset(__WAP__)}}/images/acount.png" alt="" class="login_acount">
    <input type="text" placeholder="请输入您的手机号" name="phone" class="phone">
  </label>
  <label for="">
    <img src="{{asset(__WAP__)}}/images/yzm.png" alt="" class="login_yzm">
    <input type="text" placeholder="验证码" class="yzm" name="yzm">
    <a href="javascript:;" class="send_sms" id="gSMS" onclick="get_sms_captcha('2')">发送验证码</a>
  </label>
  <label for="">
    <img src="{{asset(__WAP__)}}/images/pass.png" alt="" class="login_pass">
    <input type="text" placeholder="请输入您的登录密码(不少于6位)" name="password" class="password">
  </label>
  <div class="clearboth"></div>
  <a href="javascript:;" class="login_btn regist_btn">立即注册</a>
  <p class="regest">已有账号?<a href="{{route('index.login.index',Request()->all())}}">去登录</a></p>
  <a href="login_wechat.html" class="wechat">
    <img src="{{asset(__WAP__)}}/images/wechat.png" alt="">
  </a>
</div>
5.2、js部分代码
<script>
// 验证码
var countDownT = 60;
function get_sms_captcha(type){

  if (!$(".phone").val().match(/^1[3456789]\d{9}$/)) {
    layer.msg('请输入正确的手机号码');
    $('.phone').focus()
    return false;
  }
  else{
    $("#gSMS").attr('disabled',true)//在按钮提交之后和AJAX提交之前将按钮设置为禁用
    // 发送验证码
    $.ajax({
      headers: {
        'X-CSRF-TOKEN': $('meta[name="csrf-token"]').attr('content')
      },
      url:"{{route('index.login.sms')}}",
      type:'post',
      data:{"phone":$(".phone").val()},
      datatype:'json',
      success:function(msg){
        $("#gSMS").attr('disabled',false)//在提交成功之后重新启用该按钮
        console.log(msg)
        if(msg.code==200){
          $("#gSMS").addClass("btn-none");
          countDownT = 60;
          setTime();
          //下方写业务
        }else{
          alert(msg.data);
        }

      },error(){
        $("#gSMS").attr('disabled',false)//即使AJAX失败也需要将按钮设置为可用状态,因为有可能是网络问题导致的失败,所以需要将按钮设置为可用
        alert('网络异常,请检查下网络');
      }
    });

  }


}

function setTime(){
  if (countDownT == 0){
    $("#gSMS").attr("onclick","get_sms_captcha('2')");
    $("#gSMS").text("获取验证码");
    $("#gSMS").removeClass("btn-none");
  } else{
    $("#gSMS").attr("onclick","#");
    $("#gSMS").text("重新发送("+countDownT+")");
    countDownT--;
    setTimeout(function () {
      setTime();
    },1000)
  }
}
</script>


 关于简忆
关于简忆 简忆诞生的故事


 粤ICP备16092285号
文章评论(0)